
Note to my Readers:
I wanted to say welcome to my new followers, and thank you to the old timers for getting your friends and coworkers to join. I really appreciate it, especially since now I'm in my serious mode of putting together everything to submit to the design calls. I have to rewrite my resume for scrapbooking instead of education, write an essay about myself and why I want to work for a certain company, and make projects using each company's products, and have a blog that is up and running. Thank you for being a part of my journey.
Recent Projects:
I attended a new scrapbooking group's 12 hour crop but only lasted 8 hours. I made some Valentine gifts. It was an interesting experience which will be a later post. Here is a sneak peek. Intrigued? (unless you received one)
I entered a challenge for My Little Shoebox (scrapbooking company) using a new medium I've never really worked with - canvas. I usually associate a stretched canvas with acrylic painting.
I also entered a challenge with Sassafras (another scrapbooking company), and also experimented with another object - wooden letterpress alphabet and printer's tray.
The Love U card with the rolled roses was sent to my Dad in Taiwan for his birthday, in case you were anxiously waiting by your mailbox. If you really want a card from me, just let me know and I'll see what I can do.
Canvas Wall Hanging Tutorial:
This was the project I was posting clues about previously with the cherry blossom and fan photos. I started with a 12 x 12 stretched canvas. The cheapest place I found these were at Big Lots for $5.00. I painted the whole thing with an accent color, a verdant spring green. I put on the background piece, cut a tree shape from a brown piece of paper mimicking the smaller trees on My Little Shoebox's patterned papers and my photo. I glued every in place with Mod Podge.

I fussy cut a lot of the little objects from the patterned papers and glued some of the pieces down.
 I
I
 For the bridge, I drew out one on a contrasting piece of paper for the background, cut out the original and popped it up in the foreground with foam adhesive and placed the girl in the middle for a 3-D effect.
 I laminated the frame and lanterns for more durability since they are on the outside. I strung the lanterns on a wire and used crimp beads to keep them separated while hanging on the line. I raised the frame by putting foam adhesive behind it.

 I wanted another 3-D element since this is a wall hanging and space isn't an issue like it is in an album. This is where I made the fan and origami flowers.

 I don't usually fold origami so I looked through Youtube for instructions. You can see the video here if you are interested in these cherry blossoms. I had to make several before they came out correctly.
 I covered everything with Mod Podge for more protection, added glitter and Glossy Accents for a finishing touch.
I hope you enjoyed my tutorial, if you have scrapbooking questions, feel free to ask. I look at all my comments. This is my spring wall hanging and is the first in a four part seasonal wall display. Thanks for stopping by.
I wanted to say welcome to my new followers, and thank you to the old timers for getting your friends and coworkers to join. I really appreciate it, especially since now I'm in my serious mode of putting together everything to submit to the design calls. I have to rewrite my resume for scrapbooking instead of education, write an essay about myself and why I want to work for a certain company, and make projects using each company's products, and have a blog that is up and running. Thank you for being a part of my journey.
Recent Projects:
I attended a new scrapbooking group's 12 hour crop but only lasted 8 hours. I made some Valentine gifts. It was an interesting experience which will be a later post. Here is a sneak peek. Intrigued? (unless you received one)
 |
| Sneak peek of my Valentine's project |
I entered a challenge for My Little Shoebox (scrapbooking company) using a new medium I've never really worked with - canvas. I usually associate a stretched canvas with acrylic painting.
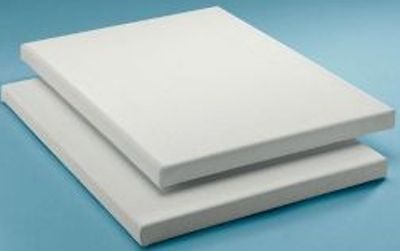 |
| Stretched canvas |
I also entered a challenge with Sassafras (another scrapbooking company), and also experimented with another object - wooden letterpress alphabet and printer's tray.
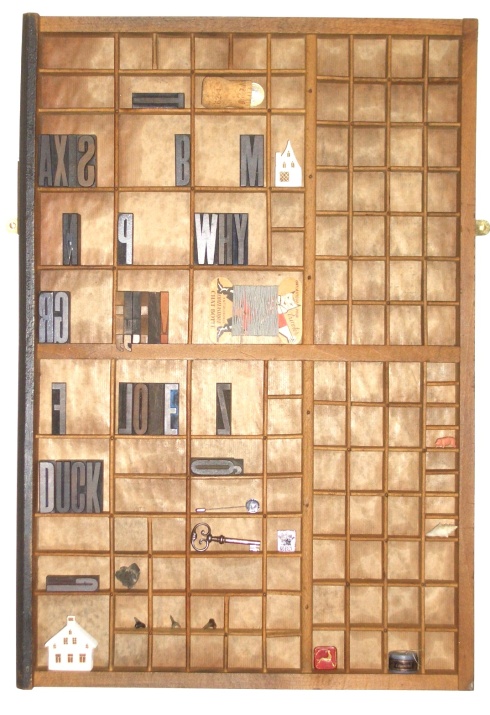 |
| Printer's tray |
Canvas Wall Hanging Tutorial:
 |
| My Little Shoebox canvas wall hanging |
This was the project I was posting clues about previously with the cherry blossom and fan photos. I started with a 12 x 12 stretched canvas. The cheapest place I found these were at Big Lots for $5.00. I painted the whole thing with an accent color, a verdant spring green. I put on the background piece, cut a tree shape from a brown piece of paper mimicking the smaller trees on My Little Shoebox's patterned papers and my photo. I glued every in place with Mod Podge.

I fussy cut a lot of the little objects from the patterned papers and glued some of the pieces down.


I hope you enjoyed my tutorial, if you have scrapbooking questions, feel free to ask. I look at all my comments. This is my spring wall hanging and is the first in a four part seasonal wall display. Thanks for stopping by.


1 comments:
Adorable!! The canvas hanging is such a neat idea. I love the details you put into it, so professional!
Post a Comment