Showing posts with label Fresh Squeezed Stamps. Show all posts

Tuesday, November 19, 2013

Three New Stamped Cards

I won several packs of stamps from Fresh Squeezed Stamps and wanted to use some of my new goodies. I played around with the stamps and some new techniques and wanted to share three of the cards I made. 

Card 1: Washi Inspired 
My favorite stamp set from my winnings was Breath of Fresh Flair which has numerous small images that fit on a circle stamp to make your own flairs. I thought the designs were so cute that I wanted to start with this set. I chose to break out some wash tape which I've collected but have hardly used, and paired the two together to create this fun card. 

I taped some wash in strips on a piece of cardstock. I stamped the circle outline stamp over the top using permanent ink. I punched out the circles using a circle punch, including some half circles along the edges. This was the forefront of my card. On the background, which is the actual white folded card, I stamped my images and sentiment. I used a cassette tape and bow stamp. To connect the two images, I drew in the squiggle line to represent the cassette tape ribbon being tied into a bow. I chose the "just a note" sentiment to play with the music theme. I popped the washi panel over my card with some foam adhesive. 


Card 2: Making own Background 
I also received a graphic set called Trendy Triangles. Since I normally like to use cute images rather than graphic designs, I challenged myself to use this set. 


I stamped some triangles in a variety of colors in descending and ascending columns. To tone down the colors and patterns, I stitched a layer of vellum over the top. On the vellum I stamped a jar of hearts with my sentiment. I used the same ink colors from the background for my hearts. 


I wrapped the paned with some ribbon and then popped that on top of my folded card with some foam adhesive. It came out very feminine and elegant. 


Card 3: Making own Foreground 
I made this next card for my two year old niece's birthday. Here she is along with my grandmother and my husband who were also celebrating a birthday. They each had their own cake.  


Since she wouldn't really care about the design elements, I kept the card fun and bright. I thought she'd like the colors, the shine and the people with tiny party hats. 


I stamped the front panel of the card with solid circles and stars. The smaller circle is actually the back side of an outline circle stamp, so remember that both sides of a stamp can be used if necessary. I punched out a hole on the front panel and stamped the people on the inside of the card. The hats are little triangles I cut from the leftover circles from my wash card. I added some sequins as a final touch. 


Hey party people, thanks so much for stopping by,
Wednesday, October 2, 2013

Fresh Squeezed Stamps: Happy First Birthday!


The Bash
Fresh Squeezed Stamps is celebrating their first birthday and there are fun and games all week long. If you would like to join in their birthday card challenge, see this post. There are giveaways all week long, so be sure to stop by their blog.

The Card
Since it is a birthday, I made them this birthday card using one of their first stamp sets, The Sweet Life. I was asked to be a guest designer today, along with all the former guest designers. If you need some birthday inspiration, there are a ton of birthday cards on the blog this week.


The Details
I took a coffee stirrer stamp and stamped just the stem part in green in varying heights by masking the unused portion of the stamp. The top of the coffee stirrer has a little heart on it. I stamped just the heart portion in different colors on top of the stem to make heart shaped flowers. I wanted a few larger hearts so I took a heart outline stamp, reversed it, and stamped using the back of the stamp for a solid heart. This way I could vary the height and sizes of the flowers. I choose ink colors based on the chevron stripe from my patterned paper. 


I stamped and cut out a bee and popped it up over the chevron stripe. I added some sparkle with a glitter pen on the hearts and bee. 


Stop by Fresh Squeezed Stamps' blog today and enter to win one of their subway series stamp. There are daily giveaways this week. 

Supplies
Cardstock: CutCardStock (A-2)
Patterned Paper: We R Memory (Chalkboard)
Ink: Memento, Stampin' Up
Glitter Pen: Zig (Wink of Stella)
Corner Rounder: Ek Success 

I'm entering this in:
CutCardStock: World Cardmaking Day
Crafting by Designs: Anything Goes
Crafty Creations Challenges: #242 Winged Things

Thanks so much for buzzin' by,

Thursday, January 31, 2013

Paper Made Bakery: Would You Like a Spot of Tea

The Reveal
With this month's stamp set at PMB being beverage themed, I had tea on my mind, so I decided to make a tea packet card. The envelope is the tea packet which you open by lifting the front panel upwards to reveal a pouch inside, in which the tea bag shaped card rests. For more info. and photos about this project, please see today's post at Paper Made Bakery.


Monthly Summary
I made 7 projects this month using my Warms Your Heart Kit. Here is a look at my previous 6 projects.


If you want further details on any of these projects, click on the title below.
My double term with Paper Made Bakery ends today, so these will be the last of my PMB kit projects. I've really enjoyed working with this company and design team, and highly recommend their kits. It has been really fun and a great challenge for me to use a card kit in different ways, beyond just card making.

Stay tuned to see what other endeavors I'll be tackling in the future. 

Thanks so much for stoppin' by,

Thursday, January 10, 2013

Paper Made Bakery: Lil' Miss Sunshine

After 14 years together, my fluffy bundle of sunshine passed away last week. What does a scrapper do during the grieving process? The natural reaction is to scrap my memories of her on a layout. Here is Lili in all her doggie glory.


I'm using Sketches in Thyme's January sketch #98.


For my supplies I used, Paper Made Bakery's "Warms Your Heart" card kit. A card kit can easily be adapted into a layout kit by just adding a 12 x 12" cardstock as a base. It was also fun taking a tea/coffee stamp set and using it for a pet theme. For more details on this layout, please see today's post on Paper Made Bakery's blog


Thanks so much for stoppin' by,

Sunday, December 23, 2012

December Squeeze-A-Palooza Challenge

The Reveal
I wanted to let you know that Fresh Squeezed Stamps has a fun challenge during the last week of each month. Just make a card or project using any of their stamps or free digital images based on that month's theme. The little bird with the birdhouse on my gift tag is the free digital download this month. Two winners will receive a stamp set of their choice. Last month 9 people submitted, so there was a 22% chance of winning. 


The Challenge
This month's challenge is to make something based on the inspirational photos posted on their site today. Here is the photo I used. 


For the full details along with more inspirational photos and project ideas, please see today's post at Fresh Squeezed Stamps

I hope you can join in the fun. 

Thanks so much for flyin' by,

Thursday, December 20, 2012

Fresh Squeezed Stamps: A Moose for all Seasons

The Stamps
For my final December guest designer project with Fresh Squeezed Stamps, I'm working once again with the woodsy themed stamp set entitled, "Winter Wonderland." I thought the moose stamp was super cute so I wanted to feature him on a card or two or four. 


The Reveal
I ended up designing a series called, "A Moose for all Seasons". I drew out a simple sketch for the card layout and kept the placement of the embellishments, sentiment and background in basically the same place, but just changed up the themes with a few modifications. You can easily use the moose and create a card for any other occasion that you'd need. 


The Details
I started by creating the woodsy background on all my cards. I used the reverse side of the tree stamp. The front side of the stamp will give you a tree outline, but if you use the reverse side that normally clings to the block, then you can get a filled stamp. Here is the same tree stamped using the reverse, front and combined sides of the same stamp. 


Next I colored in all the moose using Copics in the same color scheme and added some black enamel on the eyes and nose. Now come the variations on a theme. 

For my Father's Day card, I hand drew a tie and mustache on the moose. I wrote in the sentiment because I didn't have a stamp for that holiday. I wanted more of a summertime look since Father's Day is in June so I dabbed on some blue ink in the sky and yellow on the ground. I wanted more of a masculine feel so I added some black and white buttons and natural jute for the final touches. 


For my Valentine's Day card, I drew a dotted bow tie and added some Stickles heart garlands on the trees. I wanted a more feminine look so I added a ruffled border strip, rounded tab, twine bow and rounded one corner to soften the look.


For my birthday card, I wanted a more playful tone. I drew a little party hat and hung it on one antler since the moose couldn't get it onto his head. I used some Sassafras felt stickers I had for the embellishments. 


For this winter card, I added some liquid appliqué for snow on the trees and a red Stickles nose reminiscent of Rudolph on the moose. This Christmas card is actually the genesis for the entire series. I was imagining a string of Christmas lights intertwined among the moose's antlers. Then I started imagining what else he could hang, like shamrocks for St. Patrick's Day, and that's how I ended up with "A Moose for all Seasons". 


If you could only have one stamp set, Winter Wonderland would be a great one since it is so versatile and you can adapt it for any holiday.

The Fun and Games
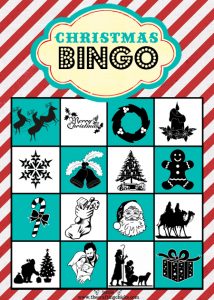
Fresh Squeezed Stamps is hosting fun games and contests with free stamps as prizes all month long. This week's game called "Christmas Bingo" is to pick 12 words from a list of 30 words. This game ends at midnight tonight and is the last one for the month. But don't worry if you can't participate in this one, there is still Squeeze-A-Palooza to look forward to on Sunday. If you want to keep up with the latest news, check out their Facebook page or Twitter feed.

Thanks so much for droppin' by,

Paper Made Bakery: Root Beer Float

Hello scrappy friends! Today I have an altered frame up on Paper Made Bakery's blog that I want to share with you. I wanted to incorporate a stamp with a photo to make it into one scene. It turned out to be a fun project. Kevin and I took lots of photos to capture the perfect angle, then I placed the stamped image onto the photo. Here is a sneak peek. 


Please hop on over to today's post at Paper Made Bakery to see the complete project in all its glory. Haha. 

Thanks so much for stoppin' by, 

Thursday, December 13, 2012

Fresh Squeezed Stamps: Mardi Gras World


The Stamps
For my second guest designer project with Fresh Squeezed Stamps, I'm working with a feather themed stamp set entitled, "Tickle My Fancy." When I first saw this set, I was reminded of Mardi Gras since feathers are used in a lot of the parade masks and costumes. I just happen to have visited Mardi Gras World in New Orleans a few weeks back, so I knew this set would be perfect on a layout. 


The Reveal
I visited the warehouse where a lot of the styrofoam props for the Mardi Gras floats were made. Artists carve the styrofoam, papier-mâché over it and then paint the sculptures. There were a lot of heads and body parts lying around as the parts are recycled, repainted and reused over the years. 


The photos were so colorful I ended up only using black and white cardstock for my papers. I added a hint of Mardi Gras colors in the alphabet stickers of my title and in a few adhesive bubbles that look like beads. For my main embellishments, I made my own stamped feather transparencies. I toned down the colors of my supplies, so they wouldn't compete for attention with the photos. 

The Details
I decided to stamp the feathers on a sheet of acetate so they would blend better into the layout. Also I wouldn't have to fussy cut around each individual barb on the feather. I used a solvent ink pad, Staz-On metallic silver, so it would create a permanent image that wouldn't smear on the acetate. I stamped all three designs multiple times and cut out the ones with a clear image. 


The silvery outlines shows up well on the black background and give just the right hint of Mardi Gras flavor.


The Fun and Games
Fresh Squeezed Stamps is hosting fun games and contests with free stamps as prizes all month long. This week's game called "Dear Santa" is to write a letter to Santa. If you aren't sure how to start, there is a template you can use here. This game ends at midnight tonight. But don't worry if you can't participate in this one, there is one more new game next Monday on their blog. If you want to keep up with the latest news, check out their Facebook page or Twitter feed. If you are interested in being on their design team, check out their design team call that is going on now through Sunday, December 16. 

I'll be back next Thursday for another new reveal.

Thanks so much for droppin' by,

Thursday, December 6, 2012

Fresh Squeezed Stamps: Winter Wonderland


I was so honored when Ryann Salamon, one of the creators of Fresh Squeezed Stamps, asked me to be a guest designer for the month of December. It is always nice to be asked instead of having to apply for a position. Of course I jumped at the chance since I use her stamps all the time and in fact have the entire collection! So I can wholeheartedly endorse the product. If you don't believe me, just check out all the eye candy on their blog

The Stamps
Today I'm working with the totally cute winter themed collection entitled, "Winter Wonderland." I always start by using the stamp the jumps out at me the most when I first look at a set. I really liked the rounded shape of the larger tree so that became my starting point. 


The Reveal
I liked the tree so much I stamped it 5 times on three different patterned papers. I also stamped the tree trunk on a darker patterned paper and pieced the tree together. As the focus feature on my card, I added brads to the middle tree to look like ornaments and to draw the eye to the center of the card. 


I adhered a star shaped jewel to the tops of each tree and layered them at different heights using different thicknesses of foam adhesive. 


Since I used more of an outdoorsy winter color scheme instead of a traditional Christmas color scheme, I used the small snowflake stamp in the set to create a snowfall background.


The Fun and Games
Fresh Squeezed Stamps is hosting fun games and contests with free stamps as prizes all month long. This week's game called "Say What?" is to write a caption to a photo they've posted here. This game ends at midnight tonight. But don't worry, there is a new game each Monday on their blog. If you want to keep up with the latest news, check out their Facebook page or Twitter feed. If you are interested in being on their design team, check out their design team call that is going on now. 

I'll be back every Thursday for some new reveals.

Thanks so much for droppin' by,


Paper Made Bakery: Happy Birthday!


Greetings scrappy friends! As I was perusing my embellishments in this month's Fresh Baked KitI noticed one of the bingo chips had a 28 on it. Since my sister's 28th birthday occurred this week, the opportunity was too good to pass up. 


I quickly made a card for her to replace the card I already had ready. I picked the bold colors and patterns that I thought she'd like. 


To see the whole project and her reaction, please see today's post on Paper Made Bakery's blog.

Thanks so much for droppin' by,

Monday, December 3, 2012

Paper Made Bakery: December Release Blog Hop + Giveaway

The Hop:
Welcome to Paper Made Bakery's new December release blog hop. If you've just arrived from Wida's site, then you've come to the right place. If you would like to start from the beginning, please hop on over to Paper Made Bakery's blog. If you are lost, this the blog hop order:

Michelle McClure (←you are here)
Lisa Arana (←go here next)

The Kit:
December's Fresh Baked Kit entitled Soda in Sohofeatures colorful, graphic designs from the Soho Garden collection by American Crafts with a matching stamp set called "Soda-lighted" by Fresh Squeezed Stamps. Be sure to grab at kit before they sell out. 


The Reveal:
I was in New Orleans during Thanksgiving week this year and took numerous photos. A few of the photos were taken at night so I grouped those together because of the lighting. Within the photos, there were a lot of glass elements so I thought these would be a good fit with the soda bottle stamp. 


The Details:
When I saw this month's stamp set, I really liked the shape of the soda bottle. I wanted to use it on a layout even though I wasn't utilizing a soda theme. I chose a solid background paper with some distressing (Oxford collection by Basic Grey). I picked a stamp pad with a similar color found in the distressing for a tone on tone effect. 


I stamped the bottle in a rows, leaving space for another bottle in between. This turned a plain, solid sheet into a patterned background paper that subtly matched my photos. 


Since I took some photos in front of a pharmacy museum which had a beautiful display of apothecary bottles, I had to pull out the gumball jar stamp from last month's Christmas Treats set. I stamped it with a permanent ink onto acetate and then colored them in with different markers. It turned out kind of streaky so I just cut out the plain jars and abandoned the markers. 


I then stamped the jar onto a spritzed card that was a rejected draft of my ornament card. I cut out just the central portion of the jar. 


I paper pieced them together to get a filled clear glass look. Whoever said two wrongs don't make a right wasn't a scrapper. 


The die cuts in the embellishment pack are so easy to use and add a pop of color to a page. The journaling card had a tab on the top already so I repeated that shape on each row of my photos as a label. 


There are so many fun components in the kit and stamp set to play with this month. I really enjoyed putting this layout together. I hope you'll have a great time experimenting with your kit.

The Giveaway:
As a way to say thank you for participating in today's blog hop, Paper Made Bakery is giving away a great prize. You can enter by midnight on Wednesday, December 5th by using the Rafflecopter widget below. 

Good luck to all! Your next stop is Lisa's blog. Remember there are daily inspiration projects and tutorials on PMB's blog all month long. 


a Rafflecopter giveaway

Thanks so much for hoppin' by,