Showing posts with label Birthday. Show all posts

Thursday, October 17, 2013

Paper House: Origami Cards

The Projects
I wanted to make a boy and girl version of a similarly designed card to show the versatility of the different Paper House collections. I thought origami would add a fun touch and the weight of Paper House’s papers are just perfect for folding.  


Boy Scout Card
To fold the shirts, I followed the pictures from Origami Resource Center. I cut three rectangles at 3” x 4.5” from different sections of the My Lil’ Scout papers to get different colors.
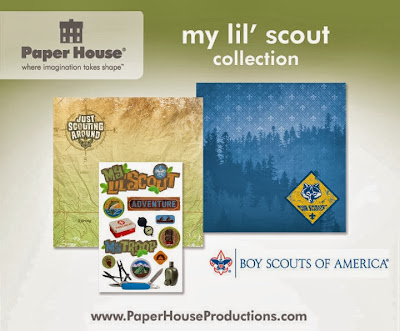


I tied ribbon around the collars to look like neckerchiefs. I finished it with some black acrylic paint from a squeeze bottle to make the buttons. I used some 3-D stickers for the sentiment and embellishments.


You can also use a dollar bill, or any paper money, and fold it into a shirt. That would be a fun way to give money instead of using a money holder.

Supplies
Cardstock
Paper Clip 
Ribbon
Twine
Acrylic Paint

Birthday Girl Card
For the birthday girl card, I wanted some brightly colored dresses as the focal point. I gave three dresses to my niece for her birthday, so I thought some origami dresses would be perfect on the card.


The Gymnastic paper has some rainbow stripes on it which will yield a variety of dress colors. I cut some 3” x 3” squares from one strip across the page. Each square makes a different colored dress so you can mix and match.


I followed the instructions from Inklings & Yarns’ blog to fold the dresses. This is a written tutorial, there are also many video ones if that is your preference. I like referring to diagrams when I'm folding. For a final touch, I added some floral nail decals on each dress. These come a variety of designs and colors and can be found at beauty supply stores. They look like fimo clay. I find that the beauty supply stores are kind of pricy so I actually bought this at a discount clothes store in the accessories section.


Supplies
Cardstock
Paper Clip 
Nail Decal
Twine

 Tips
• Practice first on some scratch paper before using the patterned papers. I did that and it saved me from wasting some patterned papers.
• The shirt is easier to fold than the dress. I'd start with the shirt first.
• Use a bone folder to give you sharp creases. This really gives you crisp folds and makes it less bulky.
• The mini clothes hanger is made from a regular size paper clip. Start by bending it slightly apart. Wrap the shorter end around the longer end and crimp it closed. Then curl the top of the hanger into a hook shape. Cut off the excess wire.


• You can easily change the look of the clothing for different occasions. For example, make the dresses in white for a wedding card or add a tie to the shirt for Father’s Day.

If you would like an instruction sheet, here is a downloadable PDF. This project is also up on Paper House's blog today


I'm entering this in the following challenges:
4 Crafty Chicks: #164 Multiple Layers
4 Krafty Girlz: Anything Goes
Crafty Ribbons Challenge: #66 Anything with Ribbons
The Crafter's Cafe: #33 How Adorable
Crafting with Dragonflies: #13 Nature, Trees, Leaves

Thanks so much for stoppin' by,

Wednesday, October 2, 2013

Fresh Squeezed Stamps: Happy First Birthday!


The Bash
Fresh Squeezed Stamps is celebrating their first birthday and there are fun and games all week long. If you would like to join in their birthday card challenge, see this post. There are giveaways all week long, so be sure to stop by their blog.

The Card
Since it is a birthday, I made them this birthday card using one of their first stamp sets, The Sweet Life. I was asked to be a guest designer today, along with all the former guest designers. If you need some birthday inspiration, there are a ton of birthday cards on the blog this week.


The Details
I took a coffee stirrer stamp and stamped just the stem part in green in varying heights by masking the unused portion of the stamp. The top of the coffee stirrer has a little heart on it. I stamped just the heart portion in different colors on top of the stem to make heart shaped flowers. I wanted a few larger hearts so I took a heart outline stamp, reversed it, and stamped using the back of the stamp for a solid heart. This way I could vary the height and sizes of the flowers. I choose ink colors based on the chevron stripe from my patterned paper. 


I stamped and cut out a bee and popped it up over the chevron stripe. I added some sparkle with a glitter pen on the hearts and bee. 


Stop by Fresh Squeezed Stamps' blog today and enter to win one of their subway series stamp. There are daily giveaways this week. 

Supplies
Cardstock: CutCardStock (A-2)
Patterned Paper: We R Memory (Chalkboard)
Ink: Memento, Stampin' Up
Glitter Pen: Zig (Wink of Stella)
Corner Rounder: Ek Success 

I'm entering this in:
CutCardStock: World Cardmaking Day
Crafting by Designs: Anything Goes
Crafty Creations Challenges: #242 Winged Things

Thanks so much for buzzin' by,

Wednesday, September 25, 2013

Sweet Stamps: Altered Birthday Frame

This is my last project for Sweet Stamps as a guest designer. I really enjoyed my time with them this month and loved working with all of their gorgeous stamps.

The Project
My grandmother celebrated her 92nd birthday this past weekend and I wanted to make her a gift and card set. I was thinking along the lines of something monochromatic and elegant, and here is the result.


The Process
Vellum is back in popularity right now and I thought it would be the right base for the wings of some butterflies. I used this medium butterfly stamp and stamped it onto vellum using white embossing ink and white embossing powder.


After heating it and cutting it out, I wrapped the butterflies with some wire floral stamen to make the antennae. If you want color on your butterflies, color the reverse side of the vellum with markers before cutting them out. 


I purchased a plain wooden frame from Target to hold a 5 x 7" photo. I chose a very wide frame so I had more room to decorate. Since I wanted more of a monochromatic look, I printed the photo in black and white. I toyed with the idea of painting a light coat of white paint over the frame, but decided the butterflies would stand out more over the dark wood. Instead, I painted some wispy tendrils using white craft paint. To make it more durable, I added Mod Podge over just the tendrils. 


I made a few small ribbon roses and adhered the butterflies and roses onto the frame with come clear craft glue. 


I also added some smaller butterflies I punched from vellum using a Martha Stewart punch that matched the look of my stamp. I finished it off with some adhesive pearls.


I made a matching card using vellum over white cardstock. I drew in the tendrils and wrote the happy birthday sentiment in Chinese with a white pen. I added three of my extra butterflies, a few pearls and some Prima ribbon. I hope my grandmother will like this matching set.


If you have a project with roses on it, please join Sweet Stamps this week in their roses challenge

I'm entering the frame in the following challenges:
Altered Eclectics: Anything Goes Altered Items

I'm entering the card in the following challenges:
A Little Bit Crafty: Clean and Simple
Really Reasonable Ribbon's Ramblings: #80 Shabby Chic and Ribbon

Thanks so much for stoppin' by,

Tuesday, May 14, 2013

Happy Birthday Sis!

The Card
Another project I wanted to complete during the National Scrapbook Day crop I attended was a birthday card for my sister. 


The Stamps
She has always liked lanterns and did decorate a few rooms with Asian lanterns. She also recently went on a trip to Morocco and hand carried back a brass ceiling lantern, something like this one. 


I thought a Lawn Fawn stamp set, Lunar Lights, that I had would be perfect for her.

I stamped the string, lanterns and cords onto my background paper. I then stamped the lanterns onto patterned paper and paper pieced the lanterns and popped them up on the card. I added some Glossy Accents and fine glitter for some sparkle. 


The Details
I was excited that Paper Secrets had their first card sketch, and really wanted to enter their challenge. 


I rotated the sketch 90° so the lanterns could hang horizontally. I replaced the three strips with three strands of lanterns. 


We played a bingo game at the crop and I won some Authentique Seasons: Summer Paper. I thought the colors were perfect so I used that instead of the papers I packed. My neighbor at the crop gave me a mini clip which I added to the front of the card. Things always change when you are at a crop. 

Here is a peek at the inside of the card. 


I gave the card to my sister right after the crop, so I took these kind of dark photos using my iPhone at the crop. 

I'm entering this at:
Paper Secrets - May 7th Card Challenge
Forever Friends -  #17 May Challenge Anything Goes
Melonheadz Friends - Sparkle and Shine Challenge

Thanks so much for stoppin' by,

Monday, March 4, 2013

Love to Scrap: Challenge #1: Anything Goes!

The Challenge
The very first challenge on Love to Scrap's blog is entitled, "Anything Goes," so basically you can make any type of project. The design team members were given digital stamped images by Bugaboo Digi Stamps to work with. The winner will receive 7 digital stamps from Bugaboo as a prize, and the images are super cute! 


The Reveal
I made this birthday card for my nephew who will be turning 6 next month.


The Details
I chose to work with the Deacon Piper digital stamp because it reminded me of my nephew who was Peter Pan last Halloween. His sister was Tinkerbell, and my hubby was pretending to throw candy at them when they came trick-or-treating at our house.


I colored the image with Copic markers.


I made some notes using gems and a brown liner marker, stamped "Happy Birthday To You!" so it would look like the piper was playing the birthday song.


I used two pieces of BoBunny patterned papers (background) that I had lying around on my desk which I had just received from attending a crop. I matched it with a piece of scratch Scenic Route paper (banners) from my scrap pile. I love how everything from different places came together.

Supplies
Cardstock: Bazzill
Patterned Papers: Bo Bunny, Scenic Route
Digital Stamp: Bugaboo Digi Stamps
Sentiment Stamp: My Sentiments Exactly!
Ink: Prima Marketing, Stampin’ Up
Border Punch: EK Success
Gems: Doodlebug Designs
Markers: Copic

For more details about the challenge and to see the rest of the design team's projects, please see today's post on Love to Scrap. For general challenge guidelines, please go here. This challenge is open for two weeks, so get your entries in before Sunday, March 17th at 5 P.M. Pacific time. You must have something lying around begging to be seen!

I'm entering this in:
ABC Challenges - Anything Goes.
Created with Love Challenges - Anything Goes
Party Time Tuesdays - Anything Goes
Divas by Designs - Anything Goes
Catch the Bug - Anything Goes
My Grafico - Anything Goes
Paper Playtime - Anything Goes
Pause Dream Enjoy Challenges - For the Boys
Victorine Stamps - Anyting Goes
Challenges 4 Everybody - Anything Goes

Thanks so much for stoppin' by,

Thursday, December 20, 2012

Fresh Squeezed Stamps: A Moose for all Seasons

The Stamps
For my final December guest designer project with Fresh Squeezed Stamps, I'm working once again with the woodsy themed stamp set entitled, "Winter Wonderland." I thought the moose stamp was super cute so I wanted to feature him on a card or two or four. 


The Reveal
I ended up designing a series called, "A Moose for all Seasons". I drew out a simple sketch for the card layout and kept the placement of the embellishments, sentiment and background in basically the same place, but just changed up the themes with a few modifications. You can easily use the moose and create a card for any other occasion that you'd need. 


The Details
I started by creating the woodsy background on all my cards. I used the reverse side of the tree stamp. The front side of the stamp will give you a tree outline, but if you use the reverse side that normally clings to the block, then you can get a filled stamp. Here is the same tree stamped using the reverse, front and combined sides of the same stamp. 


Next I colored in all the moose using Copics in the same color scheme and added some black enamel on the eyes and nose. Now come the variations on a theme. 

For my Father's Day card, I hand drew a tie and mustache on the moose. I wrote in the sentiment because I didn't have a stamp for that holiday. I wanted more of a summertime look since Father's Day is in June so I dabbed on some blue ink in the sky and yellow on the ground. I wanted more of a masculine feel so I added some black and white buttons and natural jute for the final touches. 


For my Valentine's Day card, I drew a dotted bow tie and added some Stickles heart garlands on the trees. I wanted a more feminine look so I added a ruffled border strip, rounded tab, twine bow and rounded one corner to soften the look.


For my birthday card, I wanted a more playful tone. I drew a little party hat and hung it on one antler since the moose couldn't get it onto his head. I used some Sassafras felt stickers I had for the embellishments. 


For this winter card, I added some liquid appliqué for snow on the trees and a red Stickles nose reminiscent of Rudolph on the moose. This Christmas card is actually the genesis for the entire series. I was imagining a string of Christmas lights intertwined among the moose's antlers. Then I started imagining what else he could hang, like shamrocks for St. Patrick's Day, and that's how I ended up with "A Moose for all Seasons". 


If you could only have one stamp set, Winter Wonderland would be a great one since it is so versatile and you can adapt it for any holiday.

The Fun and Games
Fresh Squeezed Stamps is hosting fun games and contests with free stamps as prizes all month long. This week's game called "Christmas Bingo" is to pick 12 words from a list of 30 words. This game ends at midnight tonight and is the last one for the month. But don't worry if you can't participate in this one, there is still Squeeze-A-Palooza to look forward to on Sunday. If you want to keep up with the latest news, check out their Facebook page or Twitter feed.

Thanks so much for droppin' by,

Thursday, December 6, 2012

Paper Made Bakery: Happy Birthday!


Greetings scrappy friends! As I was perusing my embellishments in this month's Fresh Baked KitI noticed one of the bingo chips had a 28 on it. Since my sister's 28th birthday occurred this week, the opportunity was too good to pass up. 


I quickly made a card for her to replace the card I already had ready. I picked the bold colors and patterns that I thought she'd like. 


To see the whole project and her reaction, please see today's post on Paper Made Bakery's blog.

Thanks so much for droppin' by,

Saturday, October 6, 2012

A Sweet Challenge

Hello sweet friends! Did you know Sweet Stamp Stop hosts bi-monthly stamping challenges on their blog? It is a great way to utilize your stamp stash and qualify to wins some cute stamp sets. The challenge that begins today is a sketch challenge. Just make a card based on the following sketch and load your picture onto their Flickr group. Read about all the challenge details in today's post on Sweet Stamp Shop's blog. Here is my take on the sketch.

Birthday Boy Card
Sweet Stamp Shop Sketch Challenge
I hope you'll visit Sweet Stamp Shop's Blog and play along or just take a peek at all the DT's creations. Remember you don't have to use Sweet Stamp Shop Stamps in order to play along. 

Thanks so much for stoppin' by,

Wednesday, May 9, 2012

Paper Made Bakery Reveal: Oh Happy Day!

Kevin's New Best Friend Layout
My layout about Kevin and his little elephant friend is up on ScrapStreet Magazine this month, which you can view here. We were visiting an elephant farm last summer and we spent the day with our own elephant for the day. Kevin got a mother with a three week old 400 pound baby that liked to play with him. We gave them a bath in the river before taking a jungle trek together. 


The Reveal
I made a pop-up sentiment card for today's reveal over at Paper Made Bakery using Pink Paislee's London Market collection. This is a fun technique and gives the card a different look. For a view of the whole card and a link to the tutorial, please visit today's post on PMB. I can only show you a sneak peek here. 


The Occasion
It was my sister's birthday this past week so I made the card as a birthday card for her using PMB's Portobello Road kit. Since she is a music teacher, I went with a music theme. Luckily, the stamp set in this month's kit had a music staff and notes stamp, so it all came together for me.  Here are some photos from her party where we hung out with family and friends. 


My nephew's favorite pasttime of late is dueling with light sabers. I think he just likes to swat at me while I run away. 


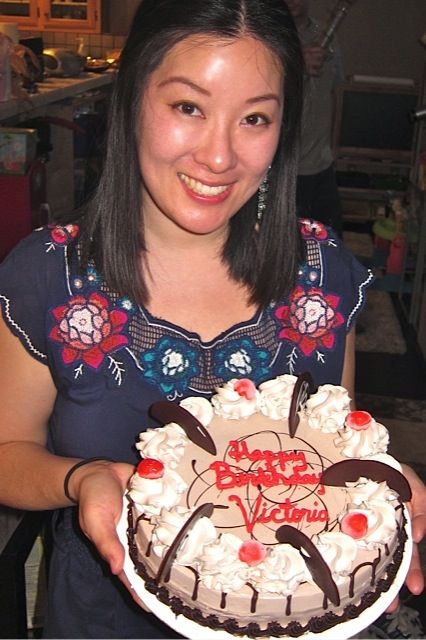
This was the cake, Jamocha almond fudge ice cream cake. Happy birthday kiddo.


Thanks so much for stoppin' by,


Thursday, May 3, 2012

Pages from the Heart: May Reveals

This is a long post today as it is actually three posts that I grouped together since they all feature the same collection. 


The Collection
This month for Pages from the Heart, I worked with Bo Bunny's "Weekend Market" collection which features travel themed images with rich colors and regal designs. I made three projects - a card, a calendar/mini-album and a layout. For all my projects I only used three sheets of patterned papers, three pieces of cardstock and the sticker sheet shown below. You really don't need a lot of supplies. So just put together a small kit and get crafting. 


Project #1: You Are Picture Perfect Pop-up Card
Since the colors in this collection were more masculine, I decided to make a card for my nephew. For my first project I was inspired by the sticker that read "picture perfect" from the sticker sheet so I designed a card built around that sentiment. I really liked the floating pop-up card I made last week so I replicated this technique. If you would like to know more about the specifics of the card like the supply list, please visit Page's blog. If you would like to view the tutorial I wrote about the pop-up element, please visit Paper Made Bakery's blog


I was looking at my nephew's birthday photos with him and I noticed the face he was making in this photo. 

He said it was because he didn't really want to take these pre-party photos as he would rather be playing in the jumper outside. I thought this was a "picture perfect" photo and used it for his card. 

Project #2: SoCal Shop Hop Calendar
Last summer I had a lot of fun visiting some of the scrapbooking stores in Southern California, collecting my passport stamps and obtaining the 6 x 6" make and takes from each store. Last year's theme was "Papercrafting around the World" so each store had their own special destination. The store across the street from me, which has since closed :(, chose Grand Ole Opry. 


I ended the summer with a bottlecap necklace and a pile of make and takes that I didn't know what to do with. I made my own steamer trunk mini-album from some chipboard die-cut packaging to house my collection. 


This year I decided to get ahead of the game a bit, and have my album done ahead of time so that pile of make and takes won't seem so overwhelming. Since this year's theme is "Wacky Holidays," I thought a calendar would be a nice change from a mini-album.


I took an existing 6 x 6" SEI album that I already had and just turned it sideways. The inside will house some monthly calendars I printed from iCal and the make and takes I'll be collecting this summer. For more info on this project, please visit this post on Page's blog. 


Project #3: Korean Family Portrait Layout
I went to Seoul, S. Korea a few weeks ago with my Dad and sister. We each picked one activity that we wanted to do while in town. My Dad wanted to tour the DMZ, and it was a very educational and surreal experience, seeing all the places that I've only read about in history books. Here we are with a S. Korean soldier in the Peace Conference Room built exactly on the MDL. 


I chose something more innocuous, visiting the Hello Kitty Cafe. I just wrote about the experience here and made a layout here


Jenn wanted to dress up in traditional Korean outfits and take photos. We walked around Myeongdong and found a studio that catered to Japanese tourists for just such an endeavor. We took our own candid shots, like this one, while the studio took more traditional shots. 


Kevin couldn't take time off of work to go as he is in the middle of boy's volleyball season, but he did Photoshop himself into a shot.


Here is the layout. For more info about the scrappy side of this layout, please visit this post on Page's blog. 
Thanks for viewing all my projects for the month for Pages from the Heart. Whew!


Have a scrappy, dappy day,