Wednesday, December 4, 2013

Paper House: Cell Phone Case Inserts

The Project
When my husband upgraded to the new iPhone 5s, I inherited his iPhone 5. The size is different from my current iPhone 4 and I needed a new cell phone case. I researched a lot of cases which was kind of overwhelming but I did end up liking several designs. I couldn't commit to any one design so I ended up purchasing a clear plastic case and making my own inserts. Then I could change it up and see if I wanted just a graphic design or a personal photo. More info can also be found on Paper House Production's blog.


The Details
I started by making a template for my insert in Silhouette Studio. I also included the space for camera and flash which I didn't want to cover. I also added some designs from my files and attached it to my frame to make an overlay.


I used the template to trace onto cardstock and patterned paper to get the correct sizing for my base. You can also use the case itself as a template. I also used my Silhouette Cameo to cut other designs, like the circle pattern overlay and the chevron stripes. 


I then just decorated my base with pictures, stickers, patterned papers and die cuts. I approached this like I was designing a page for a mini album. It is just a small amount of space to work with so I didn’t want it to get too cluttered.


This is a fun way to make your own personalized cell phone case. You can make an insert for every season or holiday, showcase your photos or just your use your favorite design. Nothing is permanent, so you can easily change out an insert for a new look without having to purchase a new case. This would make a great gift too.


Supplies
Paper House Production
Patterned Paper
Birthday Girl Tags (P-0671E)
Create (P-0597E)
Imagine (P-0598E)
Paper Pad
American Road 6” (PP-0603E)
3D Stickers
Art with Foil Accents (STTL-005E)
He Loves Me (STDM-0132E)
Sweet Birthday Girl (STDM-0181E)
Cardstock Stickers
Birthday Girl (STCX-0179E)
Other
Clear Cell Phone Case - LUVVITT
Craft Knife - X-ACTO
Cardstock - Bazzill Basics
Electronic Die Cut Machine - Silhouette Cameo

Thanks so much for stopping' by,

Tuesday, November 19, 2013

Three New Stamped Cards

I won several packs of stamps from Fresh Squeezed Stamps and wanted to use some of my new goodies. I played around with the stamps and some new techniques and wanted to share three of the cards I made. 

Card 1: Washi Inspired 
My favorite stamp set from my winnings was Breath of Fresh Flair which has numerous small images that fit on a circle stamp to make your own flairs. I thought the designs were so cute that I wanted to start with this set. I chose to break out some wash tape which I've collected but have hardly used, and paired the two together to create this fun card. 

I taped some wash in strips on a piece of cardstock. I stamped the circle outline stamp over the top using permanent ink. I punched out the circles using a circle punch, including some half circles along the edges. This was the forefront of my card. On the background, which is the actual white folded card, I stamped my images and sentiment. I used a cassette tape and bow stamp. To connect the two images, I drew in the squiggle line to represent the cassette tape ribbon being tied into a bow. I chose the "just a note" sentiment to play with the music theme. I popped the washi panel over my card with some foam adhesive. 


Card 2: Making own Background 
I also received a graphic set called Trendy Triangles. Since I normally like to use cute images rather than graphic designs, I challenged myself to use this set. 


I stamped some triangles in a variety of colors in descending and ascending columns. To tone down the colors and patterns, I stitched a layer of vellum over the top. On the vellum I stamped a jar of hearts with my sentiment. I used the same ink colors from the background for my hearts. 


I wrapped the paned with some ribbon and then popped that on top of my folded card with some foam adhesive. It came out very feminine and elegant. 


Card 3: Making own Foreground 
I made this next card for my two year old niece's birthday. Here she is along with my grandmother and my husband who were also celebrating a birthday. They each had their own cake.  


Since she wouldn't really care about the design elements, I kept the card fun and bright. I thought she'd like the colors, the shine and the people with tiny party hats. 


I stamped the front panel of the card with solid circles and stars. The smaller circle is actually the back side of an outline circle stamp, so remember that both sides of a stamp can be used if necessary. I punched out a hole on the front panel and stamped the people on the inside of the card. The hats are little triangles I cut from the leftover circles from my wash card. I added some sequins as a final touch. 


Hey party people, thanks so much for stopping by,

Monday, November 4, 2013

Paper House: Altered Cigar Box

The Project
I wanted to give a jewelry box for a birthday present and decided to make my own. I took a dark brown wooden cigar box and altered it to make a gift for a young girl. The birch bark in the scrapbooking paper still gave it the appearance of a wooden box, but with a much lighter and more feminine look.


The Inspiration
I was talking to my father who mentioned that one of his friends liked to smoke cigars. I mentioned that I would like one of his leftover cigar boxes. I forgot about this conversation until I received a package in the mail a few months later that contained two empty cigar boxes. Since my father and his friend live in Taiwan and sent it across the Pacific to me, I thought I'd better put them to good use. Here is a picture of the one of the boxes in its unaltered state. I'm sad to say the other box did not survive the transit.


Instructions
I made this at a crop forgot to take pictures during the process. I guess I was too busy talking to my cohorts.


1. Sand the outside of the box with a rough sand paper. This will let the paint or adhesive adhere better.
2. Paint the box with craft paint. You can just paint along the edges so any exposed parts of the box will not be noticeable, especially the seams.
3. Trace each side of the box onto scrapbooking paper and cut out the pieces.
4. Spread a layer of Mod Podge onto one side of the box. Place the corresponding piece of scrapbook paper onto the box. Try to lay the paper onto the box as smooth and flat as possible so it will not have air bubbles.
5. Spread another layer of Mod Podge onto the top of the scrapbook paper. Let dry.
6. Continue process with each side of the box. I left the bottom unaltered.
7. Decorate the box with embellishments and stickers.

I decorated all the exposed sides. Here is a view of some different angles. It turned out so cute, it will be difficult to give this one away.


Supplies
Backyard Birds Collection (SBC-0160) - Paper House Productions
Acrylic Paint
Sandpaper
Cigar Box
Mod Poodle
Paint Brush

If you would like an instruction sheet for this project, here is a downloadable PDF. This project is also up on Paper House's blog today


I'm entering this in:
613 Avenue Create: #44 Anything Goes
Craftin Desert Diva's Linky Party: Anything Goes
The Paper Nest Dolls: #16 Anything Goes
Simon Says Stamps Wednesday Challenge: Anything Goes

Thanks so much for stoppin' by,

Friday, October 18, 2013

Life.Paper.Scrapbook. Issue 3

The Issue
Life.Paper.Scrapbook. is a great scrapbooking blog to go to for information or if you like to enter challenges. They have a color based, a sketch based and Project Life challenge each month. Also once a quarter, they release a free online magazine. To take a look at the new fall release, Issue 3: October, just go here


The magazine is organized into different sections like Scrapbook Pages, Cards, Project Life, Stamping, Mini Albums... so there is something for everyone. My favorite aspect is the style of projects they choose, so simple and elegant. I wish I could scrap like some of the featured designers. 

My Layouts
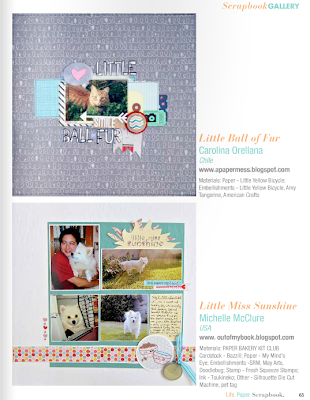
I submitted to their call and two of my layouts were included in this issue. If you look on page 65 under the Scrapbook Gallery, you will see my tribute layout to my dog Lili. She was such a cutie pie, I'm glad more people could see her. 


I also had a tongue and cheek layout, entitled "Eat your heart out Katniss" which is found on page 99 of the Stamping Gallery. 


Take a look at all the inspirational goodies inside this issue. If you would to submit to the next issue, please see this post

Thanks for stoppin' by,

Thursday, October 17, 2013

Paper House: Origami Cards

The Projects
I wanted to make a boy and girl version of a similarly designed card to show the versatility of the different Paper House collections. I thought origami would add a fun touch and the weight of Paper House’s papers are just perfect for folding.  


Boy Scout Card
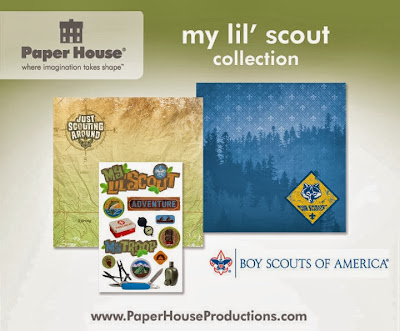
To fold the shirts, I followed the pictures from Origami Resource Center. I cut three rectangles at 3” x 4.5” from different sections of the My Lil’ Scout papers to get different colors.


I tied ribbon around the collars to look like neckerchiefs. I finished it with some black acrylic paint from a squeeze bottle to make the buttons. I used some 3-D stickers for the sentiment and embellishments.


You can also use a dollar bill, or any paper money, and fold it into a shirt. That would be a fun way to give money instead of using a money holder.

Supplies
Cardstock
Paper Clip 
Ribbon
Twine
Acrylic Paint

Birthday Girl Card
For the birthday girl card, I wanted some brightly colored dresses as the focal point. I gave three dresses to my niece for her birthday, so I thought some origami dresses would be perfect on the card.


The Gymnastic paper has some rainbow stripes on it which will yield a variety of dress colors. I cut some 3” x 3” squares from one strip across the page. Each square makes a different colored dress so you can mix and match.


I followed the instructions from Inklings & Yarns’ blog to fold the dresses. This is a written tutorial, there are also many video ones if that is your preference. I like referring to diagrams when I'm folding. For a final touch, I added some floral nail decals on each dress. These come a variety of designs and colors and can be found at beauty supply stores. They look like fimo clay. I find that the beauty supply stores are kind of pricy so I actually bought this at a discount clothes store in the accessories section.


Supplies
Cardstock
Paper Clip 
Nail Decal
Twine

 Tips
• Practice first on some scratch paper before using the patterned papers. I did that and it saved me from wasting some patterned papers.
• The shirt is easier to fold than the dress. I'd start with the shirt first.
• Use a bone folder to give you sharp creases. This really gives you crisp folds and makes it less bulky.
• The mini clothes hanger is made from a regular size paper clip. Start by bending it slightly apart. Wrap the shorter end around the longer end and crimp it closed. Then curl the top of the hanger into a hook shape. Cut off the excess wire.


• You can easily change the look of the clothing for different occasions. For example, make the dresses in white for a wedding card or add a tie to the shirt for Father’s Day.

If you would like an instruction sheet, here is a downloadable PDF. This project is also up on Paper House's blog today


I'm entering this in the following challenges:
4 Crafty Chicks: #164 Multiple Layers
4 Krafty Girlz: Anything Goes
Crafty Ribbons Challenge: #66 Anything with Ribbons
The Crafter's Cafe: #33 How Adorable
Crafting with Dragonflies: #13 Nature, Trees, Leaves

Thanks so much for stoppin' by,

Monday, October 7, 2013

Paper House: Australia Wall Hanging

The Project
I was browsing my local neighborhood thrift store and I saw some circular frames for $1.00. I bought a few and thought it would be fun to make a circular layout instead of the usual square. Later I figured out that these weren't photo frames, but were plate holders for decorative collector's plates.


The Collection
I used Paper House's Australia Collection. There are so many great details in this collection. I cut out a portion of the Ayres Rock paper, and it was the perfect background for my layout.


The Process
1. Cut  a 7” cardstock circle as a base. Cut a 7” circle on the patterned paper and adhere onto the cardstock. The cardstock isn’t seen, it gives the layout more support.

2. Using a sewing machine, stitch three revolutions around the edge of the circle. This creates a circular border without using a mat, especially if you use a contrasting colored thread.

3. Adhere your photo onto the patterned paper. Decorate with the coordinating cardstock stickers. Add your own title or use a sticker as the title.

4. For a finishing touch, add some small embellishments along the stitched circles. I used some sequins, brads and wood veneer shapes. I colored in the wood veneer shapes with a marker. I used a glitter brush tipped pen on the wood shapes and the title for some added sparkle.


5. I made my layout smaller than the frame dimension so it would look like it was floating when hung on the wall. You can make the layout to the size of the frame and not have the extra space around the edge. To attach the layout to the frame, tie some sewing thread to the back of the frame in a triangular pattern through the plate holder brackets. Place the layout on the thread and secure it with tape. To make it more secure, adhere another 7” cardstock circle over the exposed back. I just left it as is, since no one will see the back, unless you view the photo below.


If you would like an instruction sheet, here is a downloadable PDF. This project is also up on Paper House's blog today


Supplies
Paper House Productions Products:
Australia Collection (SBC-0164)
Ayers Rock paper (P-0677E)
Australia 2 Cardstock Stickers (STCX-0183E)
Other:
Collector Plate Frame for 8.5” plate: Van Hygan & Smythe
Cardstock: Bazzill
Sewing Machine: Kenmore
Thread: Coats & Clark
Sequins: Darice
Brads: Tim Holtz, Creative Impressions
Wood Veneer Shapes: Studio Calico
Markers: Copic
Glitter Pen: Zig
Tape: Scotch

Thanks so much for stoppin' by,

Wednesday, October 2, 2013

Fresh Squeezed Stamps: Happy First Birthday!


The Bash
Fresh Squeezed Stamps is celebrating their first birthday and there are fun and games all week long. If you would like to join in their birthday card challenge, see this post. There are giveaways all week long, so be sure to stop by their blog.

The Card
Since it is a birthday, I made them this birthday card using one of their first stamp sets, The Sweet Life. I was asked to be a guest designer today, along with all the former guest designers. If you need some birthday inspiration, there are a ton of birthday cards on the blog this week.


The Details
I took a coffee stirrer stamp and stamped just the stem part in green in varying heights by masking the unused portion of the stamp. The top of the coffee stirrer has a little heart on it. I stamped just the heart portion in different colors on top of the stem to make heart shaped flowers. I wanted a few larger hearts so I took a heart outline stamp, reversed it, and stamped using the back of the stamp for a solid heart. This way I could vary the height and sizes of the flowers. I choose ink colors based on the chevron stripe from my patterned paper. 


I stamped and cut out a bee and popped it up over the chevron stripe. I added some sparkle with a glitter pen on the hearts and bee. 


Stop by Fresh Squeezed Stamps' blog today and enter to win one of their subway series stamp. There are daily giveaways this week. 

Supplies
Cardstock: CutCardStock (A-2)
Patterned Paper: We R Memory (Chalkboard)
Ink: Memento, Stampin' Up
Glitter Pen: Zig (Wink of Stella)
Corner Rounder: Ek Success 

I'm entering this in:
CutCardStock: World Cardmaking Day
Crafting by Designs: Anything Goes
Crafty Creations Challenges: #242 Winged Things

Thanks so much for buzzin' by,

Friday, September 27, 2013

Runway Inspired Challenge: Condolence Card

The Card
I wanted to make a condolence card, which is always a difficult one to make. I wanted something simple and elegant, with the emphasis on the recipient and not so much the artistic design of the card. I ended up with this card, which is along the lines of what I was imagining. 


The Challenge
The inspiration for this card is actually from a dress. Previously, I had seen other design team members enter the Runway Inspired Challenges, where you create projects based on fashion inspiration. I wasn't inclined to join in until I saw the photo of the current challenge. I thought it would really match the type of card I wanted to make. Also I had been working with vellum all week so it was just perfect. 


Instead of stamping in blue ink on white cardstock, I reversed the colors and stamped in white ink on blue cardstock. I also heat embossed my background image. I folded a piece of vellum over the card base and stamped the sentiment on the vellum in two tones of blue. I finished it with some ribbon and sequins. It was quite fun to design something based on fashion. Try it some time!


I'm also entering this in:
Simon Says Stamps: Anything Goes Challenge
I used a Paper Smooches Spiritual Sampler stamp set.

Thanks so much for droppin' by,

Thursday, September 26, 2013

Caldey Island, Wales Layout

The Layout
This summer I visited Caldey Island near Tenby, Wales. It is a small island with 40 residents, 20 Cistercian monks and an Arts and Crafts style abbey. We walked to the southern point of the island which afforded spectacular cliffside views. I was twirling around like "the hills are alive" scene from Sound of Music. My Dad was reenacting the "It's..." scene from Monty Python and I don't know what the other two were doing, but we all had fun.


The Challenges
I used the September sketch from Life.Paper.Scrapbook. The main variation is instead of having thick strips of paper behind the photos, I made thin washi strips above and below the photos.


I chose my colors from their September Color Challenge, but muted them with vellum over the top. 


The Details
I chose some washi tape based on the color combo and placed it on white cardstock. I then placed a sheet of vellum over the top and stitched a seam down the middle of each strip. I cut out the strips in varying widths and adhered them on my layout.


On top of the strips below the photo, I placed my title with an embellishment cluster of stick pins and sequins. 

I placed some journaling spots on the side of one photo.


I toned down the colors of my background strips and embellishments so the photo colors would stand out. This layout came together quite quickly unlike some others that I keep altering and still can't get it right.

I'm also entering this in:
Ladybug Crafts: September Anything Goes
Crafting by Designs: Anything Goes

Thanks so much for stoppin' by,

Wednesday, September 25, 2013

Paper House: Superhero Wall Hanging

The Project
I'm really excited to share with you my first project as a designer with Paper House Productions! I made a framed wall hanging for my nephew, documenting his latest interest - reenacting the exploits of the Teenage Mutant Ninja Turtles.


The Collection
When I looked through Paper House's extensive collection of scrapbooking sets, the one that really jumped out at me was the Birthday Boy collection


Even thought it was birthday themed, I really like the super hero aspect of it, which really matched my photos. 

The Details
I took two stickers, "birthday boy" and "birthday Hero," cut out the birthday portion, and reassembled them together to form my title, "boy Hero." Around the title, I added a few more stickers like the blue 3-D mask which matched my photo perfectly. I then added some goggly eyes on top of the sticker and some sequins and wood veneer stars for some finishing touches. 


For my layout design, I used the following sketch that I created. 


Since this was a gift, I framed my layout which turned it into a wall hanging. A layout tells more of a story and is more dynamic than giving just a framed photo. If you would like an instruction sheet with the sketch, here is a downloadable PFD.


Supplies:
Paper House Products:
Birthday Boy Collection (SBC-0161)
Happy Birthday Boy paper (P-0666E0
Super Hero City paper (P-0667E)
Birthday Boy 3D Stickers (STMD-0173E)
Birthday Boy Cardstock Stickers (STCX-0180E)
Other:
Frame for 8 x 10” photo
Sequins
Goggly Eyes
Wood Veneer Stars
Markers
Glitter Glue

I'm entering this in the following challenges:
Rhedd and Rosie Challenge Blog: #16 Something for Men
Shopping Our Stash: #120 Kids

Thanks so much for flyin' by,

Sweet Stamps: Altered Birthday Frame

This is my last project for Sweet Stamps as a guest designer. I really enjoyed my time with them this month and loved working with all of their gorgeous stamps.

The Project
My grandmother celebrated her 92nd birthday this past weekend and I wanted to make her a gift and card set. I was thinking along the lines of something monochromatic and elegant, and here is the result.


The Process
Vellum is back in popularity right now and I thought it would be the right base for the wings of some butterflies. I used this medium butterfly stamp and stamped it onto vellum using white embossing ink and white embossing powder.


After heating it and cutting it out, I wrapped the butterflies with some wire floral stamen to make the antennae. If you want color on your butterflies, color the reverse side of the vellum with markers before cutting them out. 


I purchased a plain wooden frame from Target to hold a 5 x 7" photo. I chose a very wide frame so I had more room to decorate. Since I wanted more of a monochromatic look, I printed the photo in black and white. I toyed with the idea of painting a light coat of white paint over the frame, but decided the butterflies would stand out more over the dark wood. Instead, I painted some wispy tendrils using white craft paint. To make it more durable, I added Mod Podge over just the tendrils. 


I made a few small ribbon roses and adhered the butterflies and roses onto the frame with come clear craft glue. 


I also added some smaller butterflies I punched from vellum using a Martha Stewart punch that matched the look of my stamp. I finished it off with some adhesive pearls.


I made a matching card using vellum over white cardstock. I drew in the tendrils and wrote the happy birthday sentiment in Chinese with a white pen. I added three of my extra butterflies, a few pearls and some Prima ribbon. I hope my grandmother will like this matching set.


If you have a project with roses on it, please join Sweet Stamps this week in their roses challenge

I'm entering the frame in the following challenges:
Altered Eclectics: Anything Goes Altered Items

I'm entering the card in the following challenges:
A Little Bit Crafty: Clean and Simple
Really Reasonable Ribbon's Ramblings: #80 Shabby Chic and Ribbon

Thanks so much for stoppin' by,