Friday, October 18, 2013

Life.Paper.Scrapbook. Issue 3

The Issue
Life.Paper.Scrapbook. is a great scrapbooking blog to go to for information or if you like to enter challenges. They have a color based, a sketch based and Project Life challenge each month. Also once a quarter, they release a free online magazine. To take a look at the new fall release, Issue 3: October, just go here


The magazine is organized into different sections like Scrapbook Pages, Cards, Project Life, Stamping, Mini Albums... so there is something for everyone. My favorite aspect is the style of projects they choose, so simple and elegant. I wish I could scrap like some of the featured designers. 

My Layouts
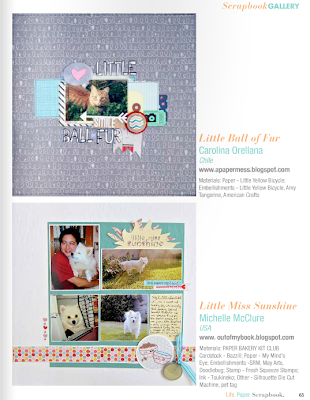
I submitted to their call and two of my layouts were included in this issue. If you look on page 65 under the Scrapbook Gallery, you will see my tribute layout to my dog Lili. She was such a cutie pie, I'm glad more people could see her. 


I also had a tongue and cheek layout, entitled "Eat your heart out Katniss" which is found on page 99 of the Stamping Gallery. 


Take a look at all the inspirational goodies inside this issue. If you would to submit to the next issue, please see this post

Thanks for stoppin' by,

Thursday, October 17, 2013

Paper House: Origami Cards

The Projects
I wanted to make a boy and girl version of a similarly designed card to show the versatility of the different Paper House collections. I thought origami would add a fun touch and the weight of Paper House’s papers are just perfect for folding.  


Boy Scout Card
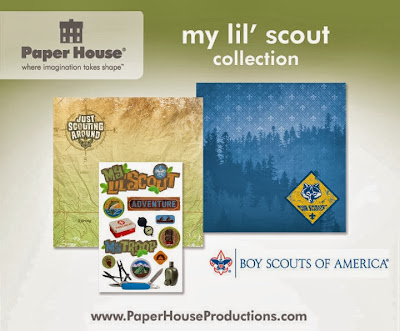
To fold the shirts, I followed the pictures from Origami Resource Center. I cut three rectangles at 3” x 4.5” from different sections of the My Lil’ Scout papers to get different colors.


I tied ribbon around the collars to look like neckerchiefs. I finished it with some black acrylic paint from a squeeze bottle to make the buttons. I used some 3-D stickers for the sentiment and embellishments.


You can also use a dollar bill, or any paper money, and fold it into a shirt. That would be a fun way to give money instead of using a money holder.

Supplies
Cardstock
Paper Clip 
Ribbon
Twine
Acrylic Paint

Birthday Girl Card
For the birthday girl card, I wanted some brightly colored dresses as the focal point. I gave three dresses to my niece for her birthday, so I thought some origami dresses would be perfect on the card.


The Gymnastic paper has some rainbow stripes on it which will yield a variety of dress colors. I cut some 3” x 3” squares from one strip across the page. Each square makes a different colored dress so you can mix and match.


I followed the instructions from Inklings & Yarns’ blog to fold the dresses. This is a written tutorial, there are also many video ones if that is your preference. I like referring to diagrams when I'm folding. For a final touch, I added some floral nail decals on each dress. These come a variety of designs and colors and can be found at beauty supply stores. They look like fimo clay. I find that the beauty supply stores are kind of pricy so I actually bought this at a discount clothes store in the accessories section.


Supplies
Cardstock
Paper Clip 
Nail Decal
Twine

 Tips
• Practice first on some scratch paper before using the patterned papers. I did that and it saved me from wasting some patterned papers.
• The shirt is easier to fold than the dress. I'd start with the shirt first.
• Use a bone folder to give you sharp creases. This really gives you crisp folds and makes it less bulky.
• The mini clothes hanger is made from a regular size paper clip. Start by bending it slightly apart. Wrap the shorter end around the longer end and crimp it closed. Then curl the top of the hanger into a hook shape. Cut off the excess wire.


• You can easily change the look of the clothing for different occasions. For example, make the dresses in white for a wedding card or add a tie to the shirt for Father’s Day.

If you would like an instruction sheet, here is a downloadable PDF. This project is also up on Paper House's blog today


I'm entering this in the following challenges:
4 Crafty Chicks: #164 Multiple Layers
4 Krafty Girlz: Anything Goes
Crafty Ribbons Challenge: #66 Anything with Ribbons
The Crafter's Cafe: #33 How Adorable
Crafting with Dragonflies: #13 Nature, Trees, Leaves

Thanks so much for stoppin' by,
Monday, October 7, 2013

Paper House: Australia Wall Hanging

The Project
I was browsing my local neighborhood thrift store and I saw some circular frames for $1.00. I bought a few and thought it would be fun to make a circular layout instead of the usual square. Later I figured out that these weren't photo frames, but were plate holders for decorative collector's plates.


The Collection
I used Paper House's Australia Collection. There are so many great details in this collection. I cut out a portion of the Ayres Rock paper, and it was the perfect background for my layout.


The Process
1. Cut  a 7” cardstock circle as a base. Cut a 7” circle on the patterned paper and adhere onto the cardstock. The cardstock isn’t seen, it gives the layout more support.

2. Using a sewing machine, stitch three revolutions around the edge of the circle. This creates a circular border without using a mat, especially if you use a contrasting colored thread.

3. Adhere your photo onto the patterned paper. Decorate with the coordinating cardstock stickers. Add your own title or use a sticker as the title.

4. For a finishing touch, add some small embellishments along the stitched circles. I used some sequins, brads and wood veneer shapes. I colored in the wood veneer shapes with a marker. I used a glitter brush tipped pen on the wood shapes and the title for some added sparkle.


5. I made my layout smaller than the frame dimension so it would look like it was floating when hung on the wall. You can make the layout to the size of the frame and not have the extra space around the edge. To attach the layout to the frame, tie some sewing thread to the back of the frame in a triangular pattern through the plate holder brackets. Place the layout on the thread and secure it with tape. To make it more secure, adhere another 7” cardstock circle over the exposed back. I just left it as is, since no one will see the back, unless you view the photo below.


If you would like an instruction sheet, here is a downloadable PDF. This project is also up on Paper House's blog today


Supplies
Paper House Productions Products:
Australia Collection (SBC-0164)
Ayers Rock paper (P-0677E)
Australia 2 Cardstock Stickers (STCX-0183E)
Other:
Collector Plate Frame for 8.5” plate: Van Hygan & Smythe
Cardstock: Bazzill
Sewing Machine: Kenmore
Thread: Coats & Clark
Sequins: Darice
Brads: Tim Holtz, Creative Impressions
Wood Veneer Shapes: Studio Calico
Markers: Copic
Glitter Pen: Zig
Tape: Scotch

Thanks so much for stoppin' by,

Wednesday, October 2, 2013

Fresh Squeezed Stamps: Happy First Birthday!


The Bash
Fresh Squeezed Stamps is celebrating their first birthday and there are fun and games all week long. If you would like to join in their birthday card challenge, see this post. There are giveaways all week long, so be sure to stop by their blog.

The Card
Since it is a birthday, I made them this birthday card using one of their first stamp sets, The Sweet Life. I was asked to be a guest designer today, along with all the former guest designers. If you need some birthday inspiration, there are a ton of birthday cards on the blog this week.


The Details
I took a coffee stirrer stamp and stamped just the stem part in green in varying heights by masking the unused portion of the stamp. The top of the coffee stirrer has a little heart on it. I stamped just the heart portion in different colors on top of the stem to make heart shaped flowers. I wanted a few larger hearts so I took a heart outline stamp, reversed it, and stamped using the back of the stamp for a solid heart. This way I could vary the height and sizes of the flowers. I choose ink colors based on the chevron stripe from my patterned paper. 


I stamped and cut out a bee and popped it up over the chevron stripe. I added some sparkle with a glitter pen on the hearts and bee. 


Stop by Fresh Squeezed Stamps' blog today and enter to win one of their subway series stamp. There are daily giveaways this week. 

Supplies
Cardstock: CutCardStock (A-2)
Patterned Paper: We R Memory (Chalkboard)
Ink: Memento, Stampin' Up
Glitter Pen: Zig (Wink of Stella)
Corner Rounder: Ek Success 

I'm entering this in:
CutCardStock: World Cardmaking Day
Crafting by Designs: Anything Goes
Crafty Creations Challenges: #242 Winged Things

Thanks so much for buzzin' by,