The Stamps
For my final December guest designer project with Fresh Squeezed Stamps, I'm working once again with the woodsy themed stamp set entitled, "Winter Wonderland." I thought the moose stamp was super cute so I wanted to feature him on a card or two or four.
The Reveal
I ended up designing a series called, "A Moose for all Seasons". I drew out a simple sketch for the card layout and kept the placement of the embellishments, sentiment and background in basically the same place, but just changed up the themes with a few modifications. You can easily use the moose and create a card for any other occasion that you'd need.
The Details
I started by creating the woodsy background on all my cards. I used the reverse side of the tree stamp. The front side of the stamp will give you a tree outline, but if you use the reverse side that normally clings to the block, then you can get a filled stamp. Here is the same tree stamped using the reverse, front and combined sides of the same stamp.
Next I colored in all the moose using Copics in the same color scheme and added some black enamel on the eyes and nose. Now come the variations on a theme.
For my Father's Day card, I hand drew a tie and mustache on the moose. I wrote in the sentiment because I didn't have a stamp for that holiday. I wanted more of a summertime look since Father's Day is in June so I dabbed on some blue ink in the sky and yellow on the ground. I wanted more of a masculine feel so I added some black and white buttons and natural jute for the final touches.
For my
Valentine's Day card, I drew a dotted bow tie and added some Stickles heart garlands on the trees. I wanted a more feminine look so I added a ruffled border strip, rounded tab, twine bow and rounded one corner to soften the look.
For my birthday card, I wanted a more playful tone. I drew a little party hat and hung it on one antler since the moose couldn't get it onto his head. I used some Sassafras felt stickers I had for the embellishments.
For this winter card, I added some liquid appliqué for snow on the trees and a red Stickles nose reminiscent of Rudolph on the moose. This Christmas card is actually the genesis for the entire series. I was imagining a string of Christmas lights intertwined among the moose's antlers. Then I started imagining what else he could hang, like shamrocks for St. Patrick's Day, and that's how I ended up with "A Moose for all Seasons".
If you could only have one stamp set,
Winter Wonderland would be a great one since it is so versatile and you can adapt it for any holiday.
The Fun and Games
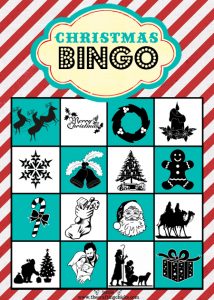 Fresh Squeezed Stamps is hosting fun games and contests with free stamps as prizes all month long. This week's game called "Christmas Bingo" is to pick 12 words from a list of 30 words. This game ends at midnight tonight and is the last one for the month. But don't worry if you can't participate in this one, there is still Squeeze-A-Palooza to look forward to on Sunday. If you want to keep up with the latest news, check out their Facebook page or Twitter feed.
Thanks so much for droppin' by,


