Tuesday, September 27, 2011

A Taste of Taiwan Layout

The Sketch:
It is time for my reveal with Sassy Lil' Sketches based on their September Week 4 sketch (which has since be removed as they have closed their site).

My Layout:
Chinese Zodiac

During the SoCal Shop Hop, where I went to visit several scrapbooking stores in the area, I came across a pack of Chinese zodiac stickers. I thought the arrangement of the stickers resembled the patterned paper squares in the sketch, so that was the inspiration for the entire layout. 

I then picked photos to match the stickers. I was in Taiwan this summer and my Dad took us to a hole in the wall noodle shop that was reminiscent of camp fire cooking that catered to soldiers in training. There was a flag on the wall behind where we were sitting. We happened to be wearing beanies of Taiwan's flag since we had just finished a tour of the Presidential Office Building.  


A Taste of Taiwan Layout
The Details:
Here is a look at the title. Instead of banners, I hung a string of lanterns above the title since it fit with my theme better. I moved the title to the top of the page and the journaling to the bottom since I couldn't cover up the stickers like I could background squares.
The Title
Instead of one large vertical photo, I opted to go with three smaller horizontal photos. I stitched around the photo block to mimic the stitching in the patterned paper.
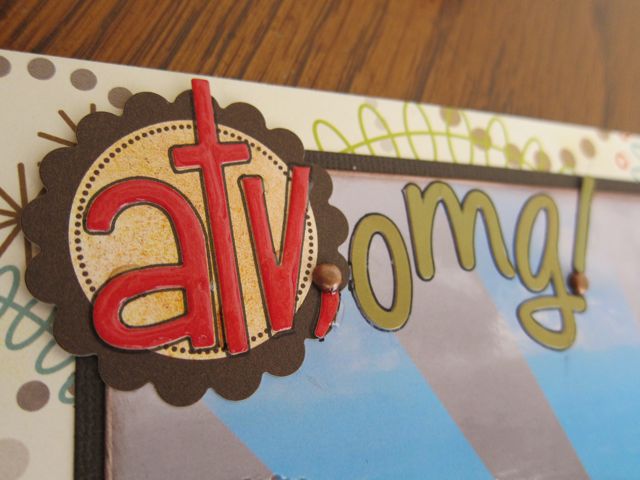
Photo Block
The background paper had a wavy frame printed around the border. I used an exacto knife to cut along the frame so I could insert the other papers I used behind it and keep the design of the frame intact. 

Journaling

If you'd like to see the other interpretations by the Sassy Lil' design team or if you'd like to upload your own version of the sketch, please go here. 

The Prizes:
If you play along with any of the September sketches, just link your layout to the corresponding post by October 5th, to win a prize from either of this month's sponsors. I saw some of the new releases from Authentique over at Pages from the Heart, and they are gorgeous.

Thanks for reading along,

Thursday, September 22, 2011

A Pages from the Heart Reveal - Nikki Sivils Collection

My Projects:
These are the two projects I made for my reveal this week over at Pages from the Heart. 

Two Page Layout of Grant's Farm
Thinking of You card
I was given the fun and colorful family themed collection from Nikki Sivils to work with.

We Are Family Collection
The Two Page Layout:

Title: Who's Stabled in Grant's Farm?
Featured Collection: Nikki Sivils' "We are Family"
Sketch: PageMaps by Becky Fleck

Page Maps by Becky Fleck

Tips:
1. Feel free to change up a sketch according to your own preferences and style. I like having more photos in a layout so I added 2 inches to the length of the photo sections. This gave me the chance to add three more 2 x 2 photos and increase the size of two of the photos on the sketch.  


2. To focus in on the solo photo, I machine stitched around the central characters several times and added some twine. I was also going for a lasso look to match my horse theme. The sketch had a scalloped frame which I substituted with the circular stitching, which was actually quite scary to sew directly on the photo.

3. The new Pearl Pens were a quick and easy way to add some dimension and pearls to a page without using messy liquid adhesives or heat. I put a dot at the top of each ruffle. It also mimicked the yellow polka dots printed on the paper. 


4. The paper collection had a family theme which didn’t necessarily match my photos, but the colors were perfect. So feel free to use a collection for the patterns or colors even if you aren’t using the theme. 

The Card:
I really liked the little houses that are in Nikki Sivils' We are Family collection. But, I ended up not using them in my layout because they were too small and the scale was off as embellishments for a large two page layout. It was the perfect size for a card though, so I designed a card featuring the cute lil' houses. 

Title: From Our House to Yours
Project: Make Your Own 3-D Scene


Tips:
1. I started by using part of a patterned paper that had a road and one group of trees. I glimmered misted it in yellow to break up the large expanse of blue. 


2. I fussy cut 4 houses, 2 of each design from another section of the patterned paper that contained houses. 

3. I glued one house straight on the paper. I popped up the other one of the same house on top of the first one using foam adhesive. This gives kind of a shadow effect. On the windows I added some Glossy Accents to make it look reflective like glass. I added some Pearl Pen on the roof, doorknobs and nail heads to emphasize those aspects of the house and to make them appear 3-D.


4. Further down the road, I repeated the same process with the other 2 houses I cut out. I also cut out some trees to balance out the scene. 


5. I connected the sentiment from one house to the other like a telephone line using a black pen. So with the addition of a sticker from the collection it reads, "Hello from our house to yours". 

6. I finished off the scene by cutting out some kites and gluing it in the sky near the "Hello" sticker, so the sticker wouldn't look to be floating by itself. 


If there isn't the perfect scene on a patterned paper, then just take the various components that a collection has to offer, and create your own. It will be the right size and scale to your project. It will also be much more interesting with the 3-D elements and any extra finishing touches you add to give it your own personal flair. 


Hope this information was helpful in your scrappy endeavors,

Thursday, September 15, 2011

A New ScrapFIT Reveal + Blog Hop + Giveaways

The Workout:
Today is the latest reveal with ScrapFit, but there is a slight twist. ScrapFIT has joined with Sketchy Thursdays for Workout #52. Here are the details for this joint venture if you'd like to participate:

Workout #52 Sketch Challenge


Welcome to the ScrapFIT & Sketchy Thursday Blog Hop!  We have joined up with Sketch Thursday this week to offer you a really tough workout!  You will need to use this sketch from Sketchy Thursday and combined it with our Workout #52 - "F is for Friendship - Friends are the family members we pick out by hand". Lets dedicated this week's layout to a special friend. Since this is a special joint workout there are a few prizes up for grabs!  


You can win this Halloween kit from our ScrapFIT sponsor Paper Issues by linking your layout to Mr. Linky on the ScrapFIT blog.
Prize from Paper Issues for your layout
Be sure to visit all of the FITgirls' blogs and comment on their Workout because one lucky random winner that leaves a comment on every FITgirl's blog will be get this prize kit! You can get to each girls blog by clicking on their photo at ScrapFIT. 
Prize for commenting during the blog hop
Once you do that be sure to head on over to Sketchy Thursday  for a chance at winning a prize from their sponsor and another chance at a prize from commenting on the Design Team's blogs! 

This workout will end on Wednesday 9/21 and the winners will be announced on Thursday 9/22.  We hope you will play along and remember you still have until the end of the month to play along with Workout #51, the Salt and Pepper one.  

My Layout:
Basically there are three opportunities for you to win a prize. You can make a layout based on the sketch and relate your theme to friendship. You can do a blog hop of all the ScrapFIT girls and leave a comment on each of our blog posts. You can also do a blog hop of all the Sketchy Thursday girls and leave a comment on each of their blogs. Without futher ado, here is my reveal:

Workout #52 based on Sketchy Thursday's sketch


When I saw the sunburst pattern in the sketch, I wanted to do something slightly different than recreating a sunset. I wanted to create the sunburst within one photo. I used a landscape photo my husband took this summer from the top of the mountain that we rode up on ATVs in Chiang Mai, Thailand. The scene is actually of a cabbage farm.

Original Photo
I imported it into Photoshop twice, once in black and white and once in color. I layered them on top of one another, and erased sections from the top photo so the bottom photo would show up in the erased portions. That is how I got the rays of color alternating with rays of black and white.

Photoshopped image
The Story:
The title is as such because I was totally terrified of riding an ATV for the first time along the highway. Sometimes we had to pass slow moving trucks around blind turns. We were on a level one ride so there was just a short mountainous section through the rough and bumpy terrain. The couple that went on the level two ride fell off their ATV three times and injured an ankle, so it is a dangerous sport. My family came out relatively unscathed, so I can say it was an interesting experience. Although my reaction after several hours of a jarring ride through the hot sun was to tell my sister, "I'm planning the next vacation." But it did give me this scrapping opportunity though, and for that I am grateful.

Title

Mountain top views


Thanks for stopping by,

Thursday, September 8, 2011

August Projects for Pages from the Heart


Pages from the Heart Design Team:

My six month term with Pages from the Heart is quickly drawing to a close. I can't believe my time with this DT has flown by already. Looking back on this experience, I realized I haven't posted any of the items I made for the store here on my blog. Part of the reason for that is by the time my projects are released on Page's blog, all my energy is focused on working on my new assignments for the next month. I'm going to go backwards chronologically and show you my assignments that were displayed in the store. I hope you don't mind seeing oldies but goodies. Isn't Pages the most charming store?

Store owner Kathy and manager Mary Jo
Pages from the Heart scrapbooking store
August Kit:

For August I received a fun and colorful kit to work with - Doodlebug Design's "Birthday Celebration". It comes in two versions, a boy or a girl themed birthday collection. I received the boy collection which is primarily blue. From my kit, I made three items - a single page layout, a gift and a card.


Single Page Layout:
Since I received the boy birthday line, I knew I would have to scrap an Isaiah birthday page.

Isaiah 4th Birthday Layout
The background paper was already very festive, but I wanted some 3D elements so I popped up some hand cut balloons and wrapped the string around the brackets to interact with the title.


I also wrote the journaling on a cloud and popped that on the page so it would blend in with the scene. Isaiah would make this fake pained smile whenever he posed for a picture. I made him a party hat  for his picture so it would look like he enjoyed his party, which he did. Behind him, I folded a strip of paper to make a pleated ruffled border.  


Whenever I work with a kit, I try to emphasize the product for the store. I received a pack of small brads so I found a way to highlight them. I put a ring of brads around a die cut. 


Gift Idea:
When I was working on these projects, it was actually in June, so I was thinking about teacher themed gifts. I was playing with the idea of giving an apple for the teacher, so I thought of giving them a bottle of sparkling apple cider. I made a bottle topper to place over the bottle, so it functions as a decoration and an appreciation card. I hand pieced a red apple and placed it over the Marinelli logo. If you really liked the teacher, you could add an Apple Store gift card along with the cider. 


Card:
Lastly I made a birthday or celebration card. I punched out 11 scalloped circles, folded them into thirds, then lined up the triangular pieces around another circle like slices of a pie to make the central flower. 


If you want more information, or all three projects on one handy dandy piece of paper, I made a newsletter for the store which you can view here. 

August Newsletter (larger pdf version)


Happy Scrappin',