Tuesday, March 29, 2011

You Color My World


Working with Page Maps
I was wondering what type of layout to work on next when Kevin suggested an artistic color challenge. I decided to use the photos we took at Knott's Berry Farm when we were experimenting with the special features that I always overlooked on my little camera. I combined that with a sketch by Becky Fleck, who authored several books including Page Maps. Here is her sketch:

Becky Fleck's page map

In terms of placement, I rotated the large horizontal photo and die cut piece, so those two elements became vertical, enlarged the photo into a 5 x 7", and combined the two smaller photos into one 3 x 4" photo. I kept the other elements in the same place.


My interpretation of the sketch

Some other fun little touches I included were, instead of 3 buttons and journaling strips, I wrote on a tag, elevated it with foam adhesive and inserted 3 stick pins into the foam. I also wanted to highlight Kevin's photo so he got a triple border and I folded a strip of ribbon underneath and trimmed the edges so it resembled a banner sign. 


Journaling and ribbon banner
 I wanted to utilize the title to further the theme. I made the more important words larger and more colorful, and the most important word with a raised and patterned initial letter. In the sketch there was a stitched circle around the title, but I did not feel like sewing on this particular layout and was thinking about another way to encapsulate the title. I ended up cutting a heart to outline "my" and used an arrow instead of the vertical strip since it matched my heart. I also popped up the heart, but it was difficult to cut the adhesive into thin slivers to fit beneath the outlined heart. All in all, I liked how it turned out. The title became more of an embellishment and fit in nicely with the page, and wasn't too stark.


Title

Usually my layouts tell a story, this was more of a technique layout. I was experimenting with color, design and adaptation of a sketch. Kevin gave me the challenge and I answered. I even submitted it to Scrapbook & Cards Today magazine where Becky Fleck is the editor. It is a free magazine found in scrapbook stores or you can download and read it here. The spring issue just came out this week. 


Kids and Scrapbooking

On Sketch Support this week, they are highlighting kid scrapbookers. Basically it is the design team members' kids using the March sketches. The layouts are so cute and their answers to interview questions are so sweet and sometimes funny. Here is 4 year old guest designer Mason working on his page. His best tip for other scrapbookers is, "Scrapbook your pictures, then put 'em on the fridge and take them to Granny!" To see all the kids' work, go to Sketch Support each day this week. 

Thanks for reading and happy spring!

Tuesday, March 22, 2011

Isaiah's Birthday Extravaganza

Future Unveilings:
      I've made 4 layouts for Sketchabilities and submitted them to the moderator. But I can't post them until the reveal dates which are on the 15 and 30th of each month, April - June.
      I also have some items I made for MLS design team call which I can't show until April 1st. So stay tuned for those fun reveals.

Handmade Items for the Rugrat:
     I was working on some party favors last night and Kevin was once again marveling at the work involved and I know he was thinking, "It's not worth it" even though he said,  "Going the extra mile?"
     I decided to get more involved with digital scrapbooking, especially for mass production projects. For this seemingly innocuous tag, I used three separate programs. First I edited the photo in iPhoto, then I motion blurred the background in Photoshop, and lastly I assembled a tag in QuarkXPress. I don't know if I'm cut out for this since technology easily frustrates me, but I'm married to tech support so I can't complain.
Isaiah's Digital Birthday Tag

The ribbon, paper and photo corners are all digital elements which prints out flat, and doesn't seem that cute in person. After I laminated it for 4 year old durability, I decided to go for a hybrid look (digital + traditional techniques). Then the tag did look better. On the 2-D tag, I added some buttons, baker's twine and
Hybrid Tag
i-Rocked on some metal accents. The textures and dimension helped. I'm sure the kids will appreciate the upgraded look.

On the front of the box I went with a Disney Cars theme. I purchased a digital kit online. It is basically a file of separate Cars themed clipart that you can put together. I made a Lightning McQueen vignette.


Box front
Party Favors


Initially, Vic didn't want a theme for Isaiah's birthday. I said since I'm making the favors anyways, it would easier if there was a theme. I knew he liked Cars so I chose it. The cake will be decorated with a Cars motif and Isaiah picked the flavor combination. You'll have to come to find out his choice.  Here are all 22 favors lined up for the par-tay!


Awaiting the children
More Items for the Rugrat:
Isaiah is officially a rugrat as it states on his ID tag, the one he is wearing in the photo above.

I made a sign for his bedroom as part of his birthday present set, entitled, "Isaiah's Vroom!" The frame was actually a framed Christmas poem which I purchased in an after Christmas sale, but I liked the built in matts so I got it for this project. Notice the similarity with the tongue poses.

Kevin also made an altered item for Isaiah. He took the paper placemat from a restaurant and made it into a mask using only his pocket knife which Isaiah wore throughout lunch. These are the hings you do to entertain a three year old.


I hope you found some inspiration and are doing well, thanks for reading!

Wednesday, March 16, 2011

St. Patrick's Day Card


Follow Up on Birthday Card:
Thanks so much for all your positive comments regarding the birthday card for Isaiah. The idea just came naturally and I made it late one night as the inspiration struck. Kevin said I could think outside the box, but I was surprised since I don't always feel original in my ideas. But then K said how many mustachioed spinning cards have you seen before? I guess that would be none. I realized I could be creative and original. It is just so much in scrapbooking is scraplifted that it is hard to realize what is truly your own idea and what is something you've seen before that is buried into your memory. 


New News:
Chiang Kai-sheck layout
Liz Qualman sketch
I've always had a secret dream to get published. In high school, we had a literary magazine and non of my stories made it. But one of my poems was chosen and I won the photography contest. My photo was on the inside cover even though I don't think of myself as much of a photographer. K takes much better photos than me, so you never know how things will work out unless you try. On a lark, I submitted my layout based on Liz Qualman's sketch since I saw a call on her blog. She chose mine to be published in the May issue of Scrapstreet Magazine. I'll post a link when it comes out. This will be my first publication! The layout I made is the Chiang Kai-shek from a previous post:


Happy St. Patrick's Day:
I was very surprised to receive my first ever St. Patrick's Day card in the mail. I did not know people sent actual store bought cards for that holiday.
St. Patrick's Day card from Kevin's
grandmother

I decided my make one to send back to Kevin's grandmother in Ohio. I didn't have any bright green papers or shamrock embellishments on hand. I ended up choosing the new Twig collection from Little Yellow Bicycle. It had a little green in it, looked kind of earthy, and there was a chipboard gnome that could be a leprechaun. I used the current sketch from Cardabilities, the sister site to Sketchabilities that I'm on. Here is the card sketch from yesterday's reveal:
Cardabilities' Sketch
Here is my first ever St. Patrick's Day card:
My St. Patrick's Day response
I punched out 3 circles for each spot, plus three extra shamrock ones, totaling 30 circles. I had previously mentioned that I didn't have any shamrock materials, so the shamrocks are from the card I received, hence there are 3 white negative space circles on the original card. Reduce, reuse, recycle, right? I printed out an Irish blessing to use as the sentiment, since I didn't want to use the work Luck on the card, like "I'm so lucky to know you." K thought it sounded cheesy and I was thinking what if it was predestination vs. luck that she is our grandmother. But that is discussion for a Sunday School class. Anyways, I finished off the card by hand stitching the circles down with some metallic thread and adding the chipboard elements and a Prima sprig. 

I bought a St. Patrick's Day beer/flower hat for my Dad since he has this Wednesday night men's dinner/pub group. I took a photo of my 90 year old Chinese grandmother wearing it. She said I could post this, along with my mother and myself. Happy St. Patrick's Day!


Friday, March 11, 2011

Happy Birthday to Isaiah

The Challenge:
I decided to enter Imaginisce's card challenge and make a birthday card for my soon to be 4 year old nephew. Here is the final result:


I found out Isaiah really likes mustaches after watching Doogal, the movie.


Isn't he adorable? The challenge's guidelines are as follows:


Use Melinda's sketch,
and incorporate the following game plan into your completed card using at least 75% Imaginisce products:
1. Three Patterned Papers
2. Three Colors
3. Three Embellishments

Here is the sketch by Melinda Spinks:

What you can't tell thus far is that there is a spinning wheel that slightly protrudes from the card.


When you turn it, the face changes but the accessories stay the same. Here are the other choices:

The Process
I wanted to use Imaginisce's Animal Crackers line because I won it and didn't want it to sit by the wayside. I wasn't sure how to use a circus themed line so I wanted to challenge myself to try. I looked through the contents of the collection, was mesmerized by the giant mustache die cut, and used that as the inspiration point. It also reminded me of the mustache battles on Jimmy Fallon, but that is another story.


I decided to put the mustache on Isaiah, but why stop there? I decided to put it on his whole family. You can spin the wheel to your heart's content. I made a template in QuarkXpress for the wheel and imported their faces into the three even spaced ovals. Now they looked like eggheads. I cut a hole in the outside card so the faces lined up and had the koala's accessories adhered around the hole. Here is the plain paper prototype and inside of the card. 
My card demystified.
I hope my family doesn't mind me posting my creations of them on the internet. I was thinking it was like dating Taylor Swift. If you date her and break up, she'll write the experience into her songs. If you know me, you might just end up on my blog.

Wednesday, March 9, 2011

A Visit to Chiang Kai-Shek's Memorial


      During the summer Kevin, Jenn and I visited my Dad in Taiwan. Even though I lived there for over 10 years, I had never visited the central patriotic hub, Liberty Square. It looked so impressive every time we drove past it. My other sister, Vic, even performed Broadway songs in the theater (one of the two red buildings flanking the memorial) with a singing troupe.

Liberty Plaza in Taipei
My Dad took us to visit Chaing Kai-shek's Memorial Hall, which is the building in the center.

Approaching Chiang Kai-shek's memorial
We were so excited to arrive:
K taking everything so seriously

Inside were displays of some of his artifacts like his limo and office:


The gift shop sold items created by his great grandson fusing Asian and Western pop art designs, which I had never seen in Taiwan before.


I purchased one of the postcards that were reminiscent of Andy Warhol's style. When I saw it, I knew I would circle punch out the designs and use them as an embellishment along with the 10 NT coin. Also, when I saw a sketch from Liz Qualman that had all these circles on it, I knew it would be perfect for this layout.


The thing I remember most about this trip which didn't make the layout, was getting totally drenched during the walk from the Memorial to the parking garage. Always carry an umbrella around in Taiwan. 

Monday, March 7, 2011

Sketchabilities' New Design Team


The design team was revealed today on sketchabilities' blog, with 20 DT members from around the world. I still can't believe I was chosen. Here are the members:


Please give a warm welcome to our new Design Team 


I have to say how in awe i am of all the applications i received.
I wish i could chose you all to be on the team, but that isnt possible!
I feel so very blessed and privledged, that so many wanted to be a part of Sketchabilities!

Julie Comeau – CANADA -returning
Sue Sykes-CANADA
Issa Lucido- PHILIPPINES-returning
Svetlana Austin - SOUTH AFRICA
Danielle Aubroeck-NETHERLANDS
Margreet Westerling NETHERLANDS
Miranda Wedekind – NETHERLANDS
Nicola Childerhouse – UNITED KINGDOM
Amelia Wahab – MALAYSIA
Mazlina Yusoff –AUSTRAILIA

You can click on the names to take a look at each member's blog. TFL!

News to Share


New Year's Resolutions:
  
      Did you make any New Year's resolutions this year? How are you coming along with them? I usually half-heartedly make some, attempt them for a bit, then forget about them. This year I really did put in the effort and took concrete steps towards achieving my main one. I think I've mentioned that I wanted to pursue becoming a member of a scrapbooking design team (DT), but I don't think I told you that it was my New Year's resolution. That is the main reason for starting this blog and getting my friends and family to follow me, hope you don't regret it. I see I even have actual scrapbooking followers now.

     I applied to three DT calls, and was not picked for the first two. I was a bit disappointed and decided to regroup and focus on developing as a scrapbooker, like in the "Finding Your Way" class I'm taking right. I had forgotten about my third application, so I was kind of shocked to receive a congratulatory email this Saturday morning. I can't believe I did achieve my New Year's resolution, and so early in the year too! I will be working with Sketchabilities starting in April. You can view the site here  and see the blogs of the other new members. The site will post a new sketch twice a month, at the middle and end of each month, you make your own layout and link it to the post within two weeks. If you prefer making cards, there is also a Cardabilities blog. Here is the current sketch if you'd like to join in with Mr. Linky and DT member Helga Vergara's take on it:


I'm really excited to work with the other designers and will keep you all updated. My first reveal will be on April 15th, tax day, so stay tuned. 

Bloggy New Look:

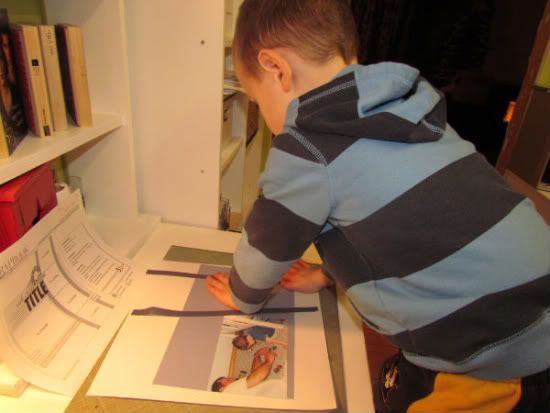
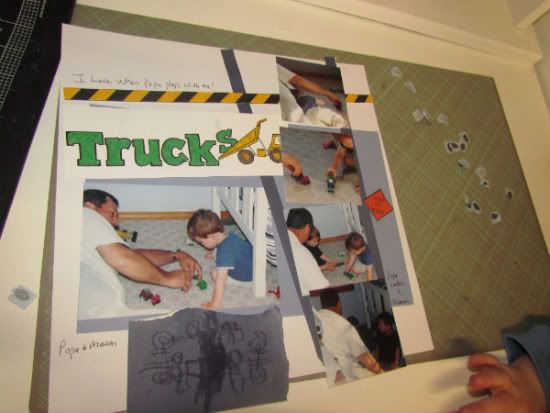
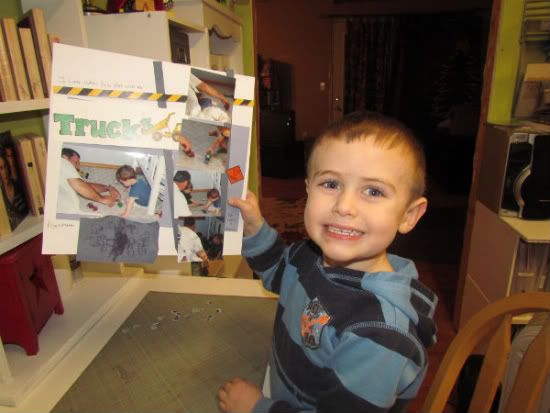
      I did give my blog a new makeover. My original blog design was something I made just to get my blog up and running. I also have to admit, it was the first digital scrapbooking item I made so I have a special fondness for it, but I never intended for it to be permanent. This little thing is comprised of 11 separate elements and numerous layers. I decided to purchase a premade blog template, so I hope I didn't disappoint you with that fact. I don't know how to talk to the computer in HTML code yet and don't have the desire to learn. I guess I'm more of a traditional scrapper than a digiscrapper. 
My original blog header

Volleyball Season Commences: 

      I usually associate the beginning of the boy's volleyball season with the Teachers vs. JV and Alumni vs. Varsity games night. It is the one time a year I play volleyball and I'm always surprised I can still play and get some kills. Here's some proof:
Me hitting around the block
Two of the JV boys were my former third grade students, they really grow up fast. Kevin really likes seeing the Alumni return, like children returning back to the roost. He's much more eloquent and expressive in his missives. Here is one of his recent Facebook status, "Having my former players come back and work with me is like being a father and seeing your son grow up to be a man. I just stand there with a stupid grin of pride. Thanks to all of you who have given back." 

     After watching varsity play for the first time this season, I know it is going to be a good one. 

Alumni vs. Varsity

Friday, March 4, 2011

What I Made at the Expo

Welcome new followers! I'm always surprised and happy to see the numbers go up. But don't worry, I won't forget my my OG followers. 

I wanted to share with you what I made during the Scrapbook Expo last week.

Prima Make and Take:

     On the convention floor, different companies have a few seats for you to make a quick item using their products, next to their sales booth. You really have to work fast in hectic conditions as someone is standing behind you awaiting your seat. It reminds me of an experience I had with Dad and Jenn of eating dim sum in Hong Kong. Anyways, Jenn and I still managed to make a beautiful page using a ton of Prima flowers. I learned they started out in the floral industry before branching out to scrapbooking, I can tell by their innovative products, as you'll see soon. This page was only $3.00 and included all the papers, flowers, bling and lace. I encourage you to try make and takes at conventions if you have the time and patience.

Vendor make and takes
My Prima make and take page


SEI Class:

     I took an one hour class using a mini-kit from SEI. They have a monthly kit club and you can find the info here. Jenn and I did join for a while but couldn't keep up because they send you so much stuff each month, so we had to cancel. What I like best about SEI is that they are always innovative in how they use their papers and products. Whenever we take their class, they always have a new way to make a mini-album or an interactive element on a layout. I learned a new way to make an accordion album out of regular  papers. Here are the two birthday cards we made in the class. Who knows, you could be getting one of these next. 

SEI birthday cards

Prima Canvas Mini Album:

     The most elaborate class I took was the Down and Dirty Canvas Album by Prima. I had never taken any of their classes before. Each person had 20 masks and 8 bottles of glimmer mists to use within a small space. It was really messy and I was afraid of getting misted by my neighbors and vice versa. My hands were totally green by the end and I thought it looked like Elphaba. But the final product was super cute so it might be worth it if you don't mind the process. The class is entitled down and dirty. The pros of this technique is that the colors are very vibrant and it makes covering a page super quick, much faster than painting or papering a chipboard background. 

Elphaba hands

Prima canvas mini album cover

Here are some of the inside pages. The designs are the non-misted sections of the page, showing the original canvas color.


Mini album inside pages

If you haven't used masks and mists, here is a quick tutorial. You cover your paper with a shape or mask. Prima sells templates made out of plastic. I have a plastic snowflake on the paper. Then I spray with a colored, glittered spray. Mine is by Tattered Angles. The spray gets all over so I spray inside a cardboard box. When you are done, remove the mask and the negative space makes a white pattern on your paper. 

Remove the mask
Spray over the mask


Final product
You can really change up a plain piece of white paper or a plain canvas album.

original Prima album

Talk to you soon! I have to go to a teachers vs. JV boys volleyball game now.